📖 All guides
Sort, filter, and read the grid
Order the grid the way you run the floor, filter by role or conflicts, and read each day's hours, headcount, and labor cost at a glance.
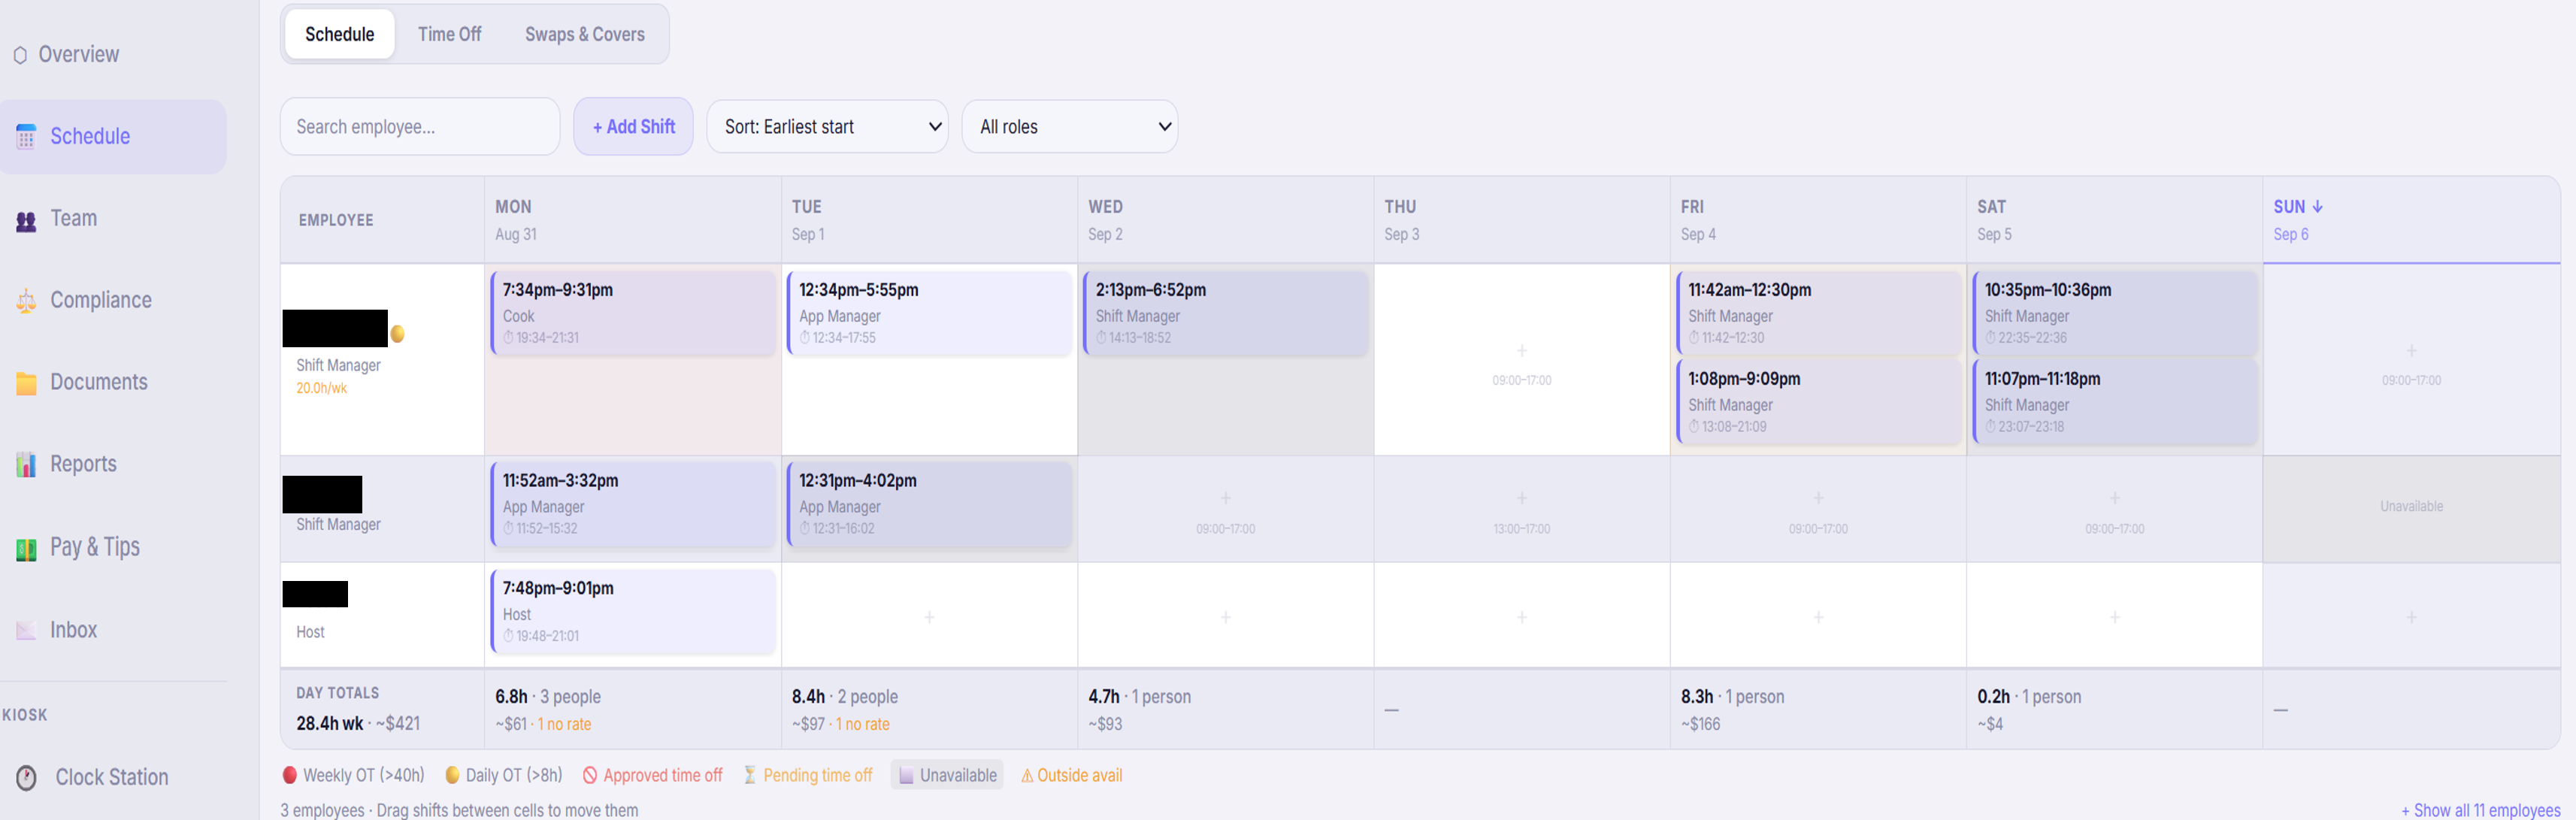
A big roster needs a grid you can shape. The toolbar above the schedule sorts and filters the rows; the footer totals each day. Your choices are remembered per browser, so the grid opens the way you left it.
- 1
Sort the rows
Sort: Earliest start (the default) ranks people by when they start today — the grid reads top-to-bottom like your day does. Click any day's column header to re-anchor the sort to that day (a ▾ marker shows which day is anchoring). Sort: Role (sections) groups the grid into role sections — all servers together, all cooks together. Name is the classic A–Z.
- 2
Filter by role or conflicts
The role filter lists the roles defined at this location — pick one to see just that crew (people with the role as a primary or extra both match). The conflicts chip narrows to rows with a warning badge, so fixing double-books doesn't mean scrolling past everyone else.
- 3
Read the day totals
The footer under each day shows scheduled hours and headcount for the shifts currently visible — filters apply to the totals too, so "Servers · Friday" answers itself. Managers also see the day's labor cost computed from each person's rate; Shift Leads see hours and headcount only, never dollars.
- 4
Read the colors
Role colors are a switch on Settings → Employee Roles (off by default — the standard grid colors tiles by status; a location can override the org setting on its own card). With it on, every role has a color and each tile wears its role's color: a published shift is filled with it, an unpublished or ad hoc shift shows it as an outline only, so one glance tells you what has gone out to the crew. The legend above the grid lists the roles in their colors — click one to filter to that crew. State keeps its own marks: a green ring while someone is clocked in, the punch times under the tile once they clock out, and the red No show, amber duplicate and amber no clock-out tiles still jump out. Set the colors on Settings → Employee Roles (each chip has a color dot; a location can override the org's choices).
Good to know
- The day-anchored sort falls back to a person's earliest shift of the week on days they don't work — nobody jumps around confusingly on their days off.
- Sort, role, and conflict choices persist per browser and reset when you switch locations (each site has its own roles).
- Role colors come from a fixed palette that never uses green, amber or red — those stay reserved for live, warning and no-show marks, so a tile's color never lies about its state.