📖 All guides
Add more locations as you grow
Opening a second site? Every plan supports unlimited locations — each with its own crew, clock setup, legal entity, and subscription.
Everything in SafeShift — break rules, reminder timing, overtime profiles, report boundaries — is configured per location. Your first location was created at signup and tuned during this setup path; this guide is for when you open the next one.
- 1
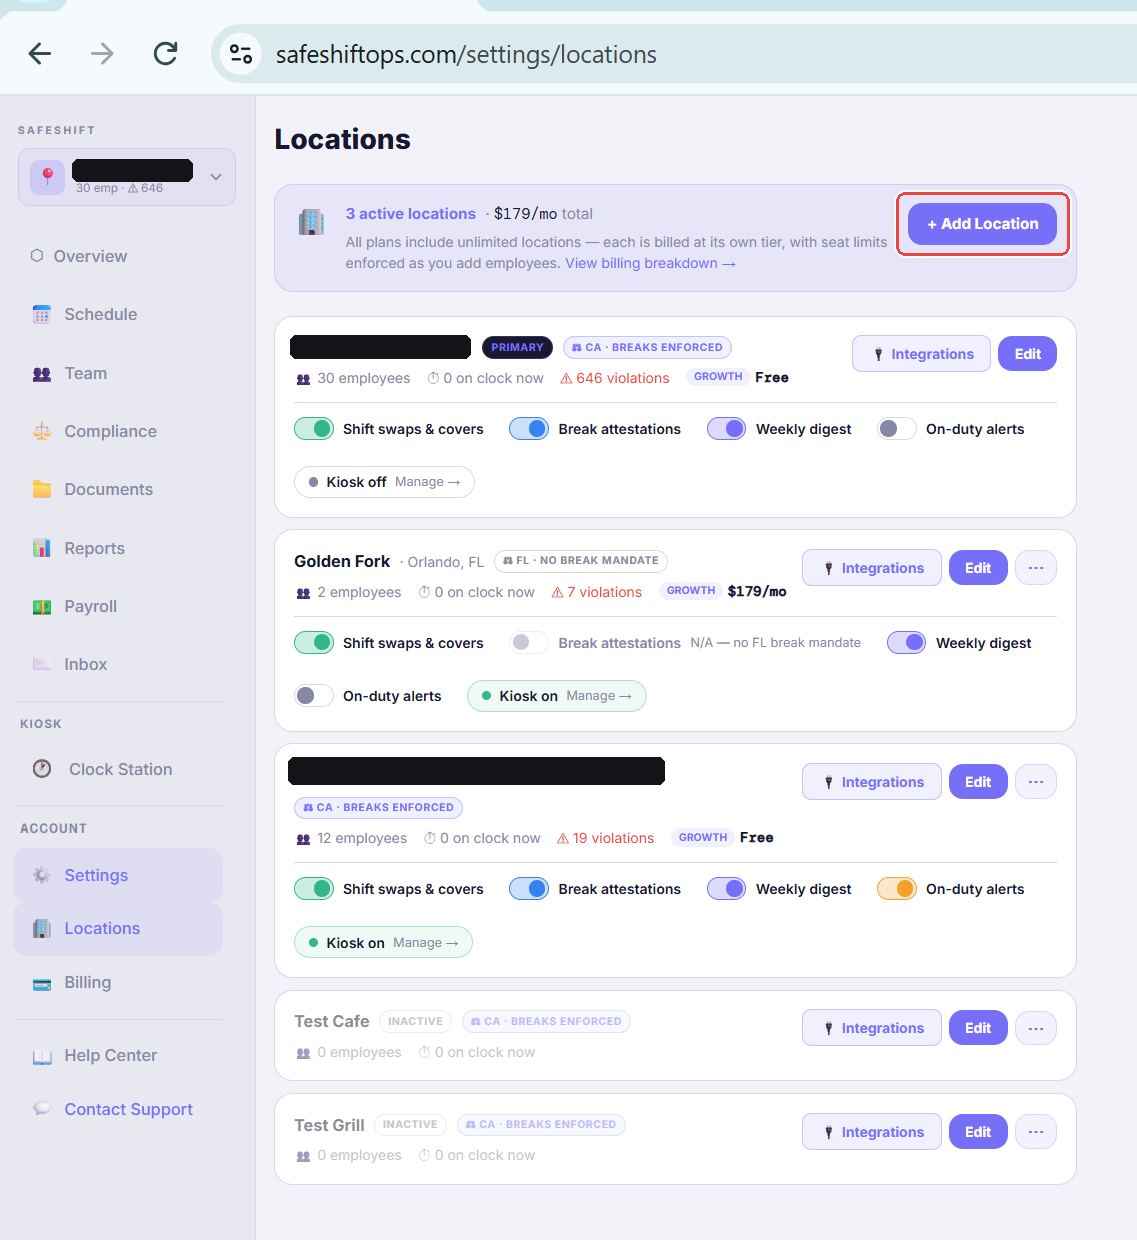
Click + Add Location
Owners see a + Add Location button at the top of Settings → Locations. Every plan supports unlimited locations — each new one simply bills at its own tier for its own crew size.
- 2
Fill in the details, then choose its plan
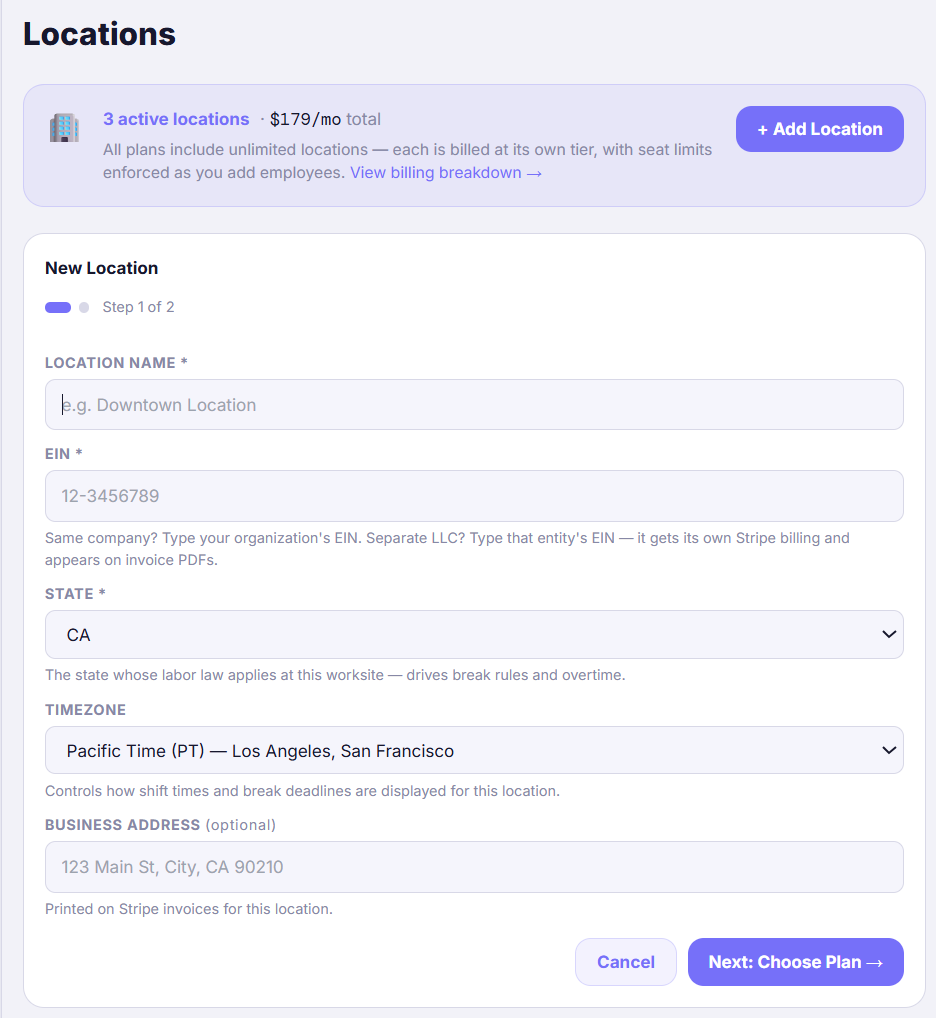
Step 1 asks for the essentials: location name, the location's EIN, work state, and timezone. If that EIN differs from your organization's, you'll also enter the legal entity name that owns it — so compliance documents name the right employer. Next: Choose Plan picks the tier that fits the new crew and takes a card: each location runs its own independent subscription.
- 3
Get the work state and timezone right
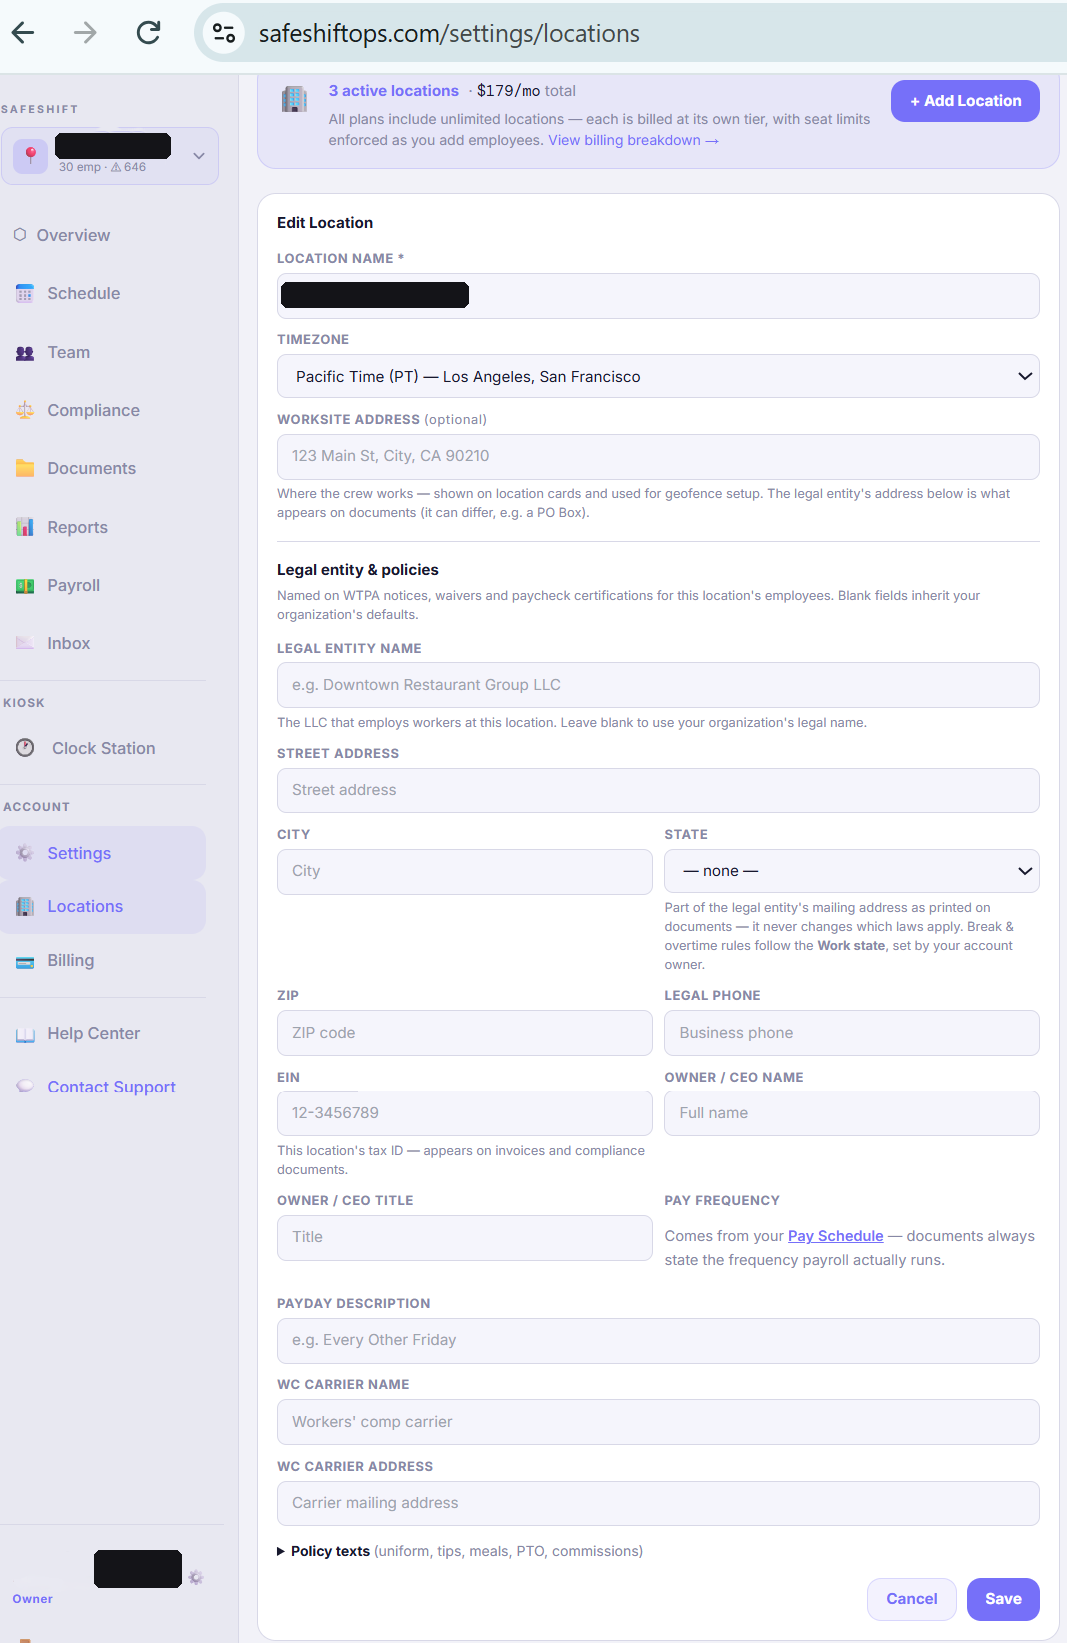
The work state is where that site's employees physically work — it decides which break laws apply there. California locations get full meal/rest monitoring with premium tracking; states without meal/rest mandates (like Florida or Texas) get federal overtime profiles and break monitoring stays off automatically. The timezone matters too: break deadlines, reminder times, and workday boundaries run in the location's local time. Only the account owner can change the work state.
- 4
Review the break policy
For states with break laws, the defaults match the state's requirements (in California: a 10-minute paid rest break per 4 hours worked and a 30-minute meal break before the end of the 5th hour). You can adjust grace periods, but the defaults are the safe choice.
- 5
Then run this setup path again — for that location
Each location picks its own clock mode, roster, and schedule: select the new location in the sidebar switcher and repeat steps 2–7 of this guide for it. New locations start with the entrance-tablet kiosk enabled as their default clock.
Good to know
- Running multiple restaurants or entities? Each location keeps its own legal name and EIN in its profile — set those under the location's legal info so compliance documents name the right entity.
- Deactivated locations keep all their history — shifts, violations, and reports are never deleted.
If something goes wrong
I added a location but it says the subscription isn't active.
A new location starts unbilled until you complete payment for it — each location has its own subscription and card. Finish the checkout you were redirected to, or activate it anytime from Settings → Billing (the new location's card has an Activate button).