📖 All guides
Add your employees
Four ways to build your roster: manual entry, CSV upload, live POS sync, or a photo of your current roster.
Everything starts with the roster. Each active employee uses one compliance seat at their location; archived employees free the seat but keep all their history.
- 1
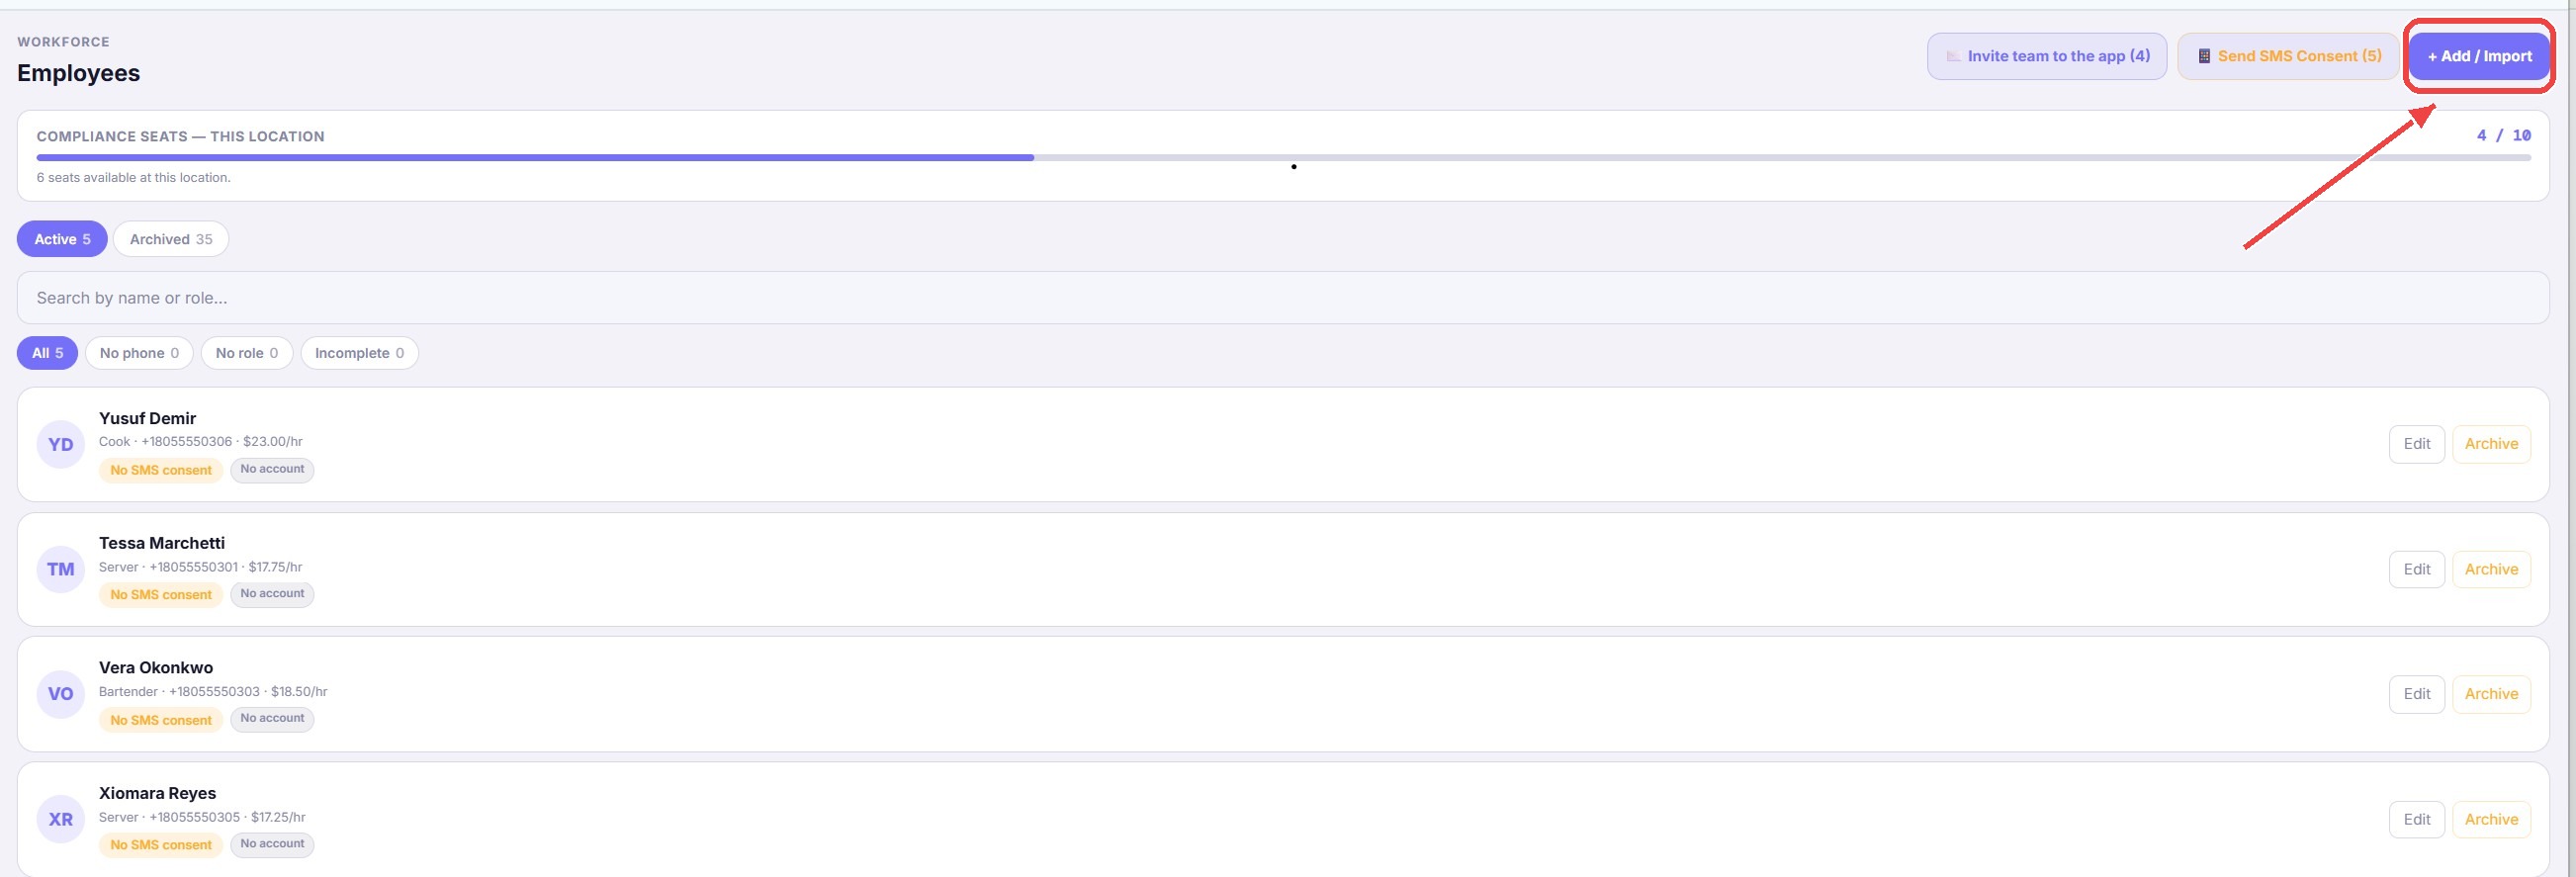
Open the Team page and click “+ Add / Import”
Go to Team in the sidebar. The + Add / Import button is at the top right.
- 2
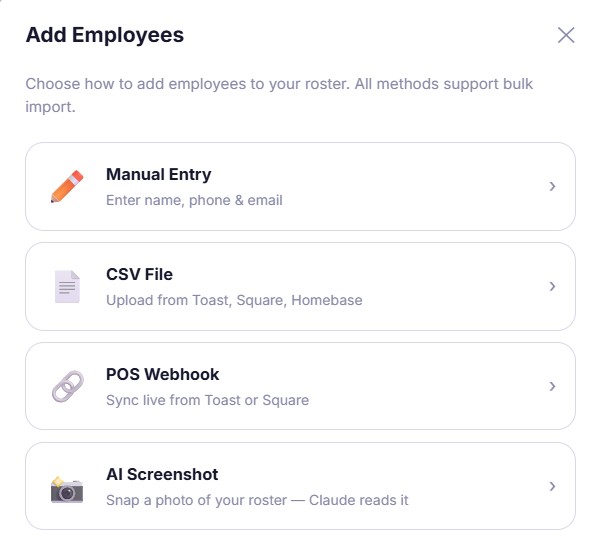
Pick how you want to add people
All four methods support bulk import: Manual Entry (type them in), CSV File (CSV or Excel .xlsx exports from Toast, Square, Homebase, ADP, Gusto and most POS/HR tools work — an ADP Employee Census report imports as-is — or start from the [blank template](/safeshift-team-import-template.csv) linked on the upload screen: one row per employee, only First and Last Name required; an optional Access Level column of Team member, Shift Lead, or Manager sets what each new person's login opens — everyone defaults to Team member, changeable anytime from their profile; an optional Hire Date column (YYYY-MM-DD or MM/DD/YYYY) starts sick-leave accrual and its waiting period, and never overwrites a date already on file), POS Webhook (sync the roster live from a connected POS), or AI Screenshot (snap a photo of any roster — even a printed one — and SafeShift reads it).
- 3
Fill in the essentials
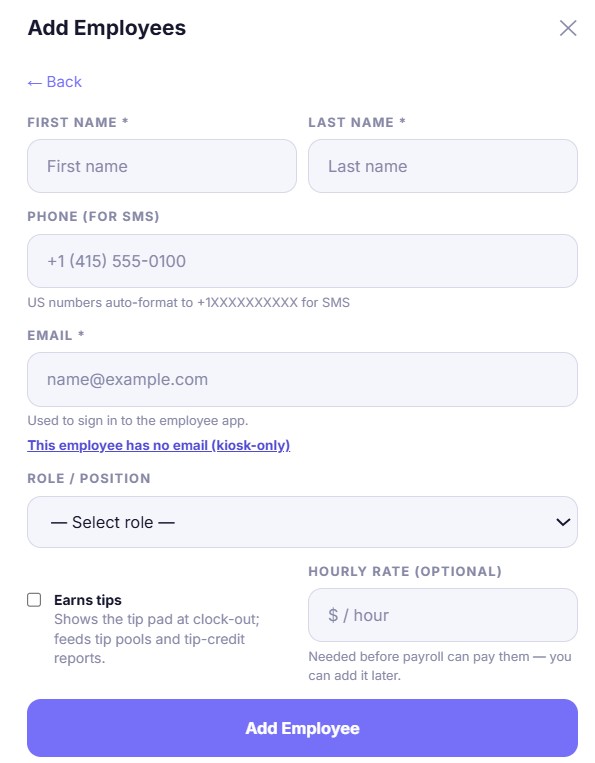
For each person you need a name and an email (it's their sign-in for the employee app — if someone has no email, use the kiosk-only link under the email field). Add a phone number if you want SMS break reminders, pick a role, check Earns tips for tipped staff, and set the hourly rate — optional now, but required before payroll reports can pay them.
- 4
Review the row chips
Each employee row shows status chips: No account (hasn't accepted an app invite yet), No SMS consent (can't legally receive SMS reminders yet), and filters for missing phone or role. The next two guides clear those chips.
Good to know
- Set hourly rates early — the Compliance page computes break-premium exposure from each person's real rate, and anyone without a rate is flagged rather than guessed.
- Importing from a POS marks device accounts (like a kitchen display) as archived and payroll-excluded automatically so they never trip compliance.
- Archiving is reversible and never deletes anything — shifts and violations stay on record for compliance evidence.